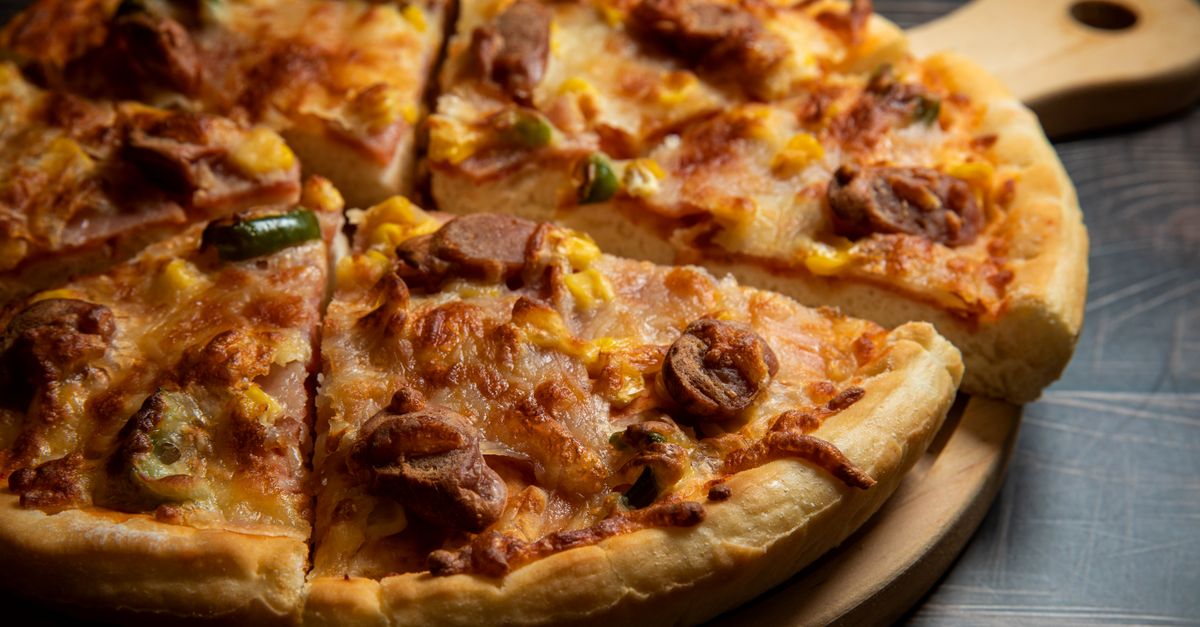
Why Your Homemade Pizza Crust Isn't Crispy (And The Pro Secrets That Deliver Pizzeria-Quality Crunch Every Time)
You’ve spent the afternoon perfecting your homemade pizza. The sauce is simmering, the cheese is grated, and the toppings are lined up. You slide your beautiful creation into the oven, brimming with anticipation. Twenty minutes later, you pull it out, a golden-brown masterpiece. But then you cut into it, and your heart sinks. Instead of that satisfying crackle and crunch you get from your favorite pizzeria, you’re met with a soft, chewy, almost soggy crust. It tastes good, sure, but it’s not the experience you craved. You might even hear the tell-tale ‘thud’ as you lift a slice, rather than the crisp snap.
I’ve been there more times than I care to admit. For years, my homemade pizzas were delicious failures in the texture department. I tried different flours, longer kneading, even pre-baking the crust, but nothing quite delivered that elusive crunch. It wasn’t until I started talking to professional pizzaiolos (and making some genuinely messy mistakes in my own kitchen) that I realized the common advice was missing critical, non-obvious details. It’s not just about temperature; it’s about managing moisture, heat transfer, and even the subtle art of waiting.
Key Takeaways
- Ditch the cold baking stone or tray; preheat your baking surface for at least 45-60 minutes to ensure a shock of high heat.
- Minimize moisture in your dough by using high-protein flour, precise hydration, and a gentle hand during stretching.
- Avoid overloading your pizza with wet ingredients; pat them dry or pre-cook watery toppings to prevent a soggy base.
- Employ a two-stage bake, starting on a hot stone and finishing directly on the oven rack, to achieve consistent crispness.
The Fatal Flaw: Your Baking Surface Isn’t Hot Enough
The single biggest reason most homemade pizza crusts lack crispness is simple: insufficient heat transfer from the baking surface. Think about a professional pizza oven. It reaches temperatures far beyond what our home ovens can achieve, and crucially, the stone or deck inside is scorching hot. When your pizza hits that extreme heat, the moisture in the dough rapidly turns to steam, creating those wonderful airy pockets and a blistered, crispy exterior. Your lukewarm baking sheet or stone just can’t replicate that.
In my early days, I’d pop my pizza directly onto a room-temperature baking sheet, or sometimes a stone that had only been in the oven for 15-20 minutes. The crust would slowly warm up, baking rather than flash-frying. The result? A perfectly cooked but sadly soft crust. The game-changer for me was extending the preheat time. I now put my pizza stone (or a heavy-duty steel baking plate, which I actually prefer for its conductivity) into a cold oven, then crank it up to its maximum temperature – usually 500-550°F (260-290°C). I let it preheat for a minimum of 45-60 minutes after the oven reaches temperature. This isn’t wasted energy; it’s crucial thermal mass building up. When you launch your pizza onto that super-heated surface, you immediately create that intense burst of steam, crisping the bottom of the crust before the top even starts to brown.
The Moisture Menace: Over-Hydrated Dough and Wet Toppings
Crispness is the enemy of moisture. While a well-hydrated dough leads to a tender, airy crumb, too much water can prevent that coveted crisp exterior. Many beginner recipes call for relatively high hydration levels, aiming for a soft, pliable dough. While great for beginner handling, it can be detrimental to crispness if not managed correctly. In my experience, a dough hydration level between 60-65% works best for a reliably crispy crust in a home oven. Anything much higher, and you’re fighting an uphill battle against excess steam that can’t escape quickly enough.
Beyond the dough itself, wet toppings are an absolute killer for crust crispness. Think about fresh mozzarella, juicy tomatoes, mushrooms, or even certain cured meats like prosciutto that release moisture as they cook. This moisture seeps into the crust, turning it soggy. I’ve ruined countless pizzas by piling on fresh, watery vegetables without a thought. What changed everything for me was a simple rule: pat dry or pre-cook watery ingredients. Slice your fresh mozzarella a bit earlier and let it drain on paper towels. If using fresh tomatoes, remove the seedy, watery core or even roast them lightly beforehand. Sauté mushrooms until their liquid has evaporated. For high-moisture vegetables like spinach, always squeeze out excess water. It adds an extra step, but the difference in crust texture is monumental.
The Overloaded Pizza Trap: Less is Truly More
There’s a natural inclination to load up your pizza with all your favorite ingredients. More cheese, more pepperoni, more veggies – surely that makes for a better pizza, right? Wrong. An overloaded pizza is a heavy pizza, and heavy pizzas struggle to crisp up. The sheer volume and weight of toppings act like a blanket, insulating the crust from the oven’s heat and preventing moisture from evaporating effectively. This is particularly true for that crucial initial stage of baking when the bottom crust is forming its structure.
I learned this the hard way with a ‘supreme’ pizza that became a floppy, delicious mess. Now, I adhere to a strict ‘less is more’ philosophy for homemade pizza. Aim for three to four toppings maximum, including cheese and sauce, and distribute them evenly and sparingly. You should still be able to see parts of the sauce and even the dough peeking through. This allows hot air to circulate around the toppings, cooking them efficiently and allowing the crust to breathe and crisp up. If you truly crave more, consider making two smaller pizzas with lighter toppings rather than one behemoth.
The Thermal Shock & Two-Stage Bake Method
Achieving that ideal crispy bottom and a beautifully blistered, airy edge often requires a two-pronged attack on heat. Relying solely on the initial blast from your hot baking surface isn’t always enough to develop full crispness throughout the crust, especially if your home oven’s top element isn’t super powerful. This is where a two-stage baking method can be a game-changer, mimicking the effects of a professional oven where radiant heat from above and conductive heat from below work in tandem.
My routine now involves baking the pizza on my preheated steel or stone for the first 5-7 minutes. During this time, the bottom crust sets and crisps rapidly. Then, for the final 3-5 minutes, I slide the pizza directly onto the oven’s wire rack. This allows hot air to circulate completely around the crust, crisping up any remaining softness in the middle and giving the edges a final, glorious puff and char. This technique also ensures that the top of your pizza, especially the cheese, doesn’t burn before the crust is fully cooked. If your oven has a broiler, a 30-60 second blast on high at the very end can also work wonders for those final blisters, but watch it like a hawk – it can go from perfect to charcoal in seconds.
The Cool-Down Conundrum: Don’t Cut Too Soon
Even after you’ve nailed the baking process, one final, subtle mistake can undo all your hard work: cutting your pizza too soon. When your pizza comes out of the oven, it’s still incredibly hot, and steam is actively escaping from the dough. If you immediately cut into it, that trapped steam has nowhere to go but into the crust, softening it right before your eyes. Furthermore, the cheese and sauce are still very liquid and can make the slices slide around, causing toppings to spill and the crust to compress.
What changed everything for me was the simple act of waiting 3-5 minutes after pulling the pizza from the oven before slicing. This allows the internal structure of the crust to set, the steam to dissipate, and the cheese and sauce to firm up slightly. The residual heat continues to crisp the crust slightly without re-introducing moisture. You’ll be amazed at the difference this brief pause makes to the overall integrity and, more importantly, the crispness of each slice. It’s a test of patience, but one that is amply rewarded.
Frequently Asked Questions
Q: Can I achieve crispy crust without a pizza stone or steel?
A: Yes, but it’s harder. A heavy cast-iron pizza pan or an inverted heavy-gauge baking sheet preheated for at least 30-40 minutes at your oven’s highest temperature can provide decent heat transfer. The key is preheating it for a long time to build up thermal mass.
Q: My crust is crispy on the bottom but soft on the top edges. What am I doing wrong?
A: This often points to uneven heat distribution. Try the two-stage bake method: start on your hot baking surface, then transfer the pizza directly to the oven rack for the last few minutes. This allows air to circulate around the top and edges, crisping them up. A quick blast under the broiler at the very end can also help, but watch it closely!
Q: How do I prevent my toppings from burning while the crust crisps?
A: Lighten up your toppings! Overloaded pizzas cook unevenly. If you have particularly delicate toppings, add them halfway through the baking process. Also, ensure your preheat is long enough so the crust gets a head start; a crispy base forms faster than toppings burn.
Q: What kind of flour is best for a crispy pizza crust?
A: A high-protein bread flour (around 12-14% protein) is generally ideal. The higher protein content develops more gluten, which creates structure and strength, allowing the crust to hold its shape and crisp up effectively. Italian ‘00’ flour is also excellent, but look for a ‘Tipo 00’ specifically for pizza, as some are for pasta and lower in protein.
Q: Can I use parchment paper to transfer my pizza to the hot stone?
A: While convenient for transferring, baking directly on parchment paper can hinder crispness as it acts as a barrier to direct heat transfer. If you must use it, remove it halfway through the bake once the crust has set enough to handle without tearing. A light dusting of cornmeal or semolina on your pizza peel is a better alternative.
Conclusion
Achieving that perfect, pizzeria-quality crispy crust at home isn’t about magical ingredients or a super-expensive oven. It’s about understanding the nuances of heat, moisture, and technique. By committing to a thorough preheat, being mindful of dough hydration and topping choices, adopting a two-stage baking approach, and exercising a little patience, you’ll transform your homemade pizzas from merely delicious to truly exceptional. Stop settling for a soggy bottom and start enjoying the satisfying crunch you deserve. Your next pizza night is about to get a serious upgrade. Experiment with these ‘pro secrets’ and taste the difference for yourself – I promise, it’s a journey worth taking.
Written by Sarah Jenkins
Saving & Financial Planning
Sarah leveraged her freelance writing income to eliminate significant debt and now shares her strategies.
You Might Also Like

Why Most People Fail at Mastering Their New Air Conditioner (And The Strategic Approach That Actually Works for Real Comfort and Savings)
Struggling with your new AC? Discover why basic settings fall short and the strategic approach to achieve real comfort and energy savings.
Why Your Car Stereo Has No Bass (And What Actually Works for Deep, Punchy Sound)
Struggling with weak car bass? Discover why most setups fail and learn the pro strategies for deep, punchy sound that transforms your driving experience.
Why Your DIY Hydroponics Fails Most People (And What Actually Works for Bountiful Harvests)
Struggling with DIY hydroponics? Discover the hidden mistakes ruining your yields and the actionable strategies that lead to thriving, abundant harvests.