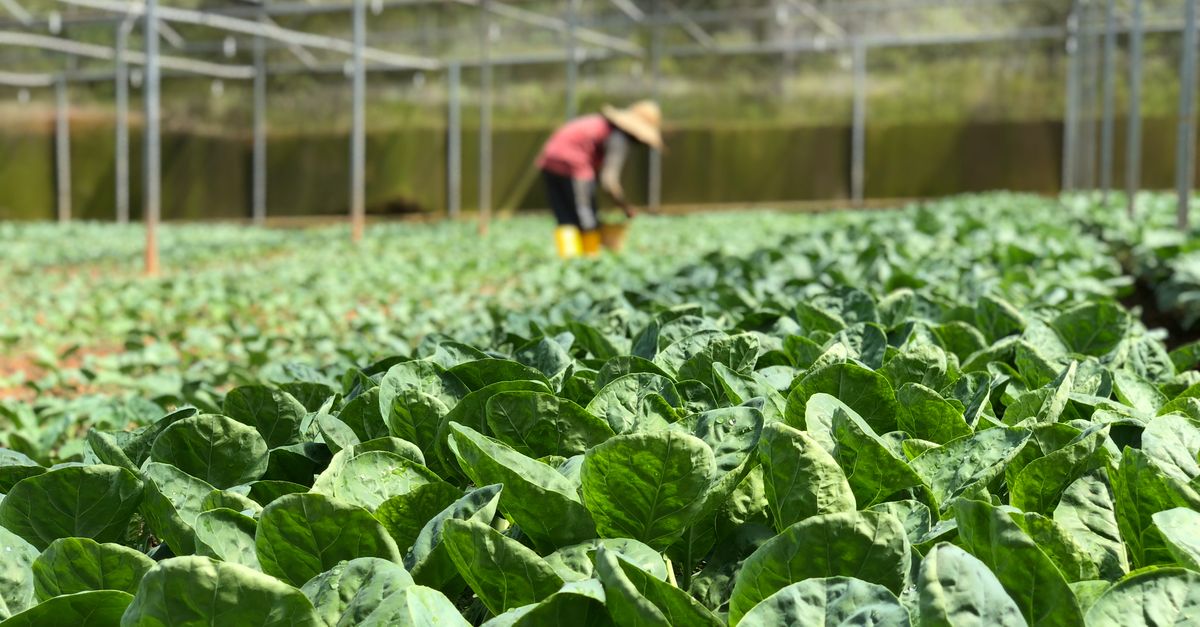
Why Your DIY Hydroponics Fails Most People (And What Actually Works for Bountiful Harvests)
You started with such high hopes, didn’t you? Visions of lush, vibrant greens, ripe tomatoes, and fragrant herbs, all growing in a tidy, soil-free system right in your living room or garage. You watched a few YouTube videos, bought some basic supplies – maybe a cheap pump, some nutrient solution, and a handful of net pots – and dove in. But instead of bountiful harvests, you’ve been met with wilting leaves, stunted growth, peculiar discolorations, or worse, slimy roots and an overall sense of defeat. I hear you. In my early days, my DIY hydroponics setup was a graveyard for plants. I killed more basil and lettuce than I care to admit, all while pouring money into ‘solutions’ that never quite worked. The mistake I see most often, and one I made repeatedly, is approaching hydroponics as a ‘set it and forget it’ system, or worse, as a simple extension of traditional gardening. It’s not. It’s a precise dance of science and art, and it demands attention to details that soil gardening often forgives.
The internet is flooded with simplistic guides that gloss over the critical nuances. They show you the shiny finished product but rarely delve into the microscopic battles happening in your nutrient reservoir. What changed everything for me was shifting my mindset from just assembling components to truly understanding the ecosystem I was trying to create. It’s about more than just water and nutrients; it’s about stability, balance, and proactive problem-solving. If your DIY hydroponics venture is leaving you with more questions than cucumbers, this article is for you. We’re going to dive into the often-overlooked culprits behind common failures and equip you with the actionable strategies that actually lead to flourishing, productive systems.
Key Takeaways
- Neglecting water quality and pH stability is the single biggest reason DIY hydroponics fail; invest in reliable testing and consistent calibration.
- Nutrient solution management goes beyond adding a capful; understanding EC/TDS is crucial for proper feeding and avoiding toxicity or deficiency.
- The ‘right’ lighting is often misunderstood; focus on DLI and spectrum, not just wattage, to meet your plants’ specific energy needs.
- Air circulation around roots and foliage is critical for health and preventing disease, an often-ignored factor in small-scale setups.
Your Water Quality and pH Are Your System’s Foundation, Not an Afterthought
When I first started, I thought, “Water is water, right?” Wrong. This is the single most common, and most devastating, misconception in DIY hydroponics. Your tap water, while potable for humans, is often a cocktail of chlorine, chloramines, dissolved minerals, and varying hardness levels that can wreak havoc on a hydroponic system. These elements can interfere with nutrient uptake, cause pH swings, and even be directly toxic to your plants. My plants looked sickly, no matter how much ‘good’ nutrient solution I added. The problem wasn’t the nutrients; it was the carrier.
The real game-changer was investing in a simple reverse osmosis (RO) filter. This gave me a blank slate – pure H2O with a starting EC (electrical conductivity) of near zero. This allowed me to build my nutrient solution from scratch, precisely controlling every element. If RO isn’t an option, at least let tap water sit out for 24 hours to off-gas chlorine, or use a dechlorinator, and then test its baseline EC/TDS (total dissolved solids). Many municipal water sources have significant background EC, meaning you’re adding nutrients on top of existing dissolved solids, potentially pushing your plants into toxicity.
Beyond water source, pH stability is non-negotiable. Nutrients are only available to plants within a narrow pH range (typically 5.5 to 6.5 for most hydroponic crops). Outside this ‘sweet spot,’ even if the nutrients are present in your reservoir, your plants simply can’t absorb them. My early systems suffered from wild pH swings, leading to iron deficiencies (yellowing leaves) one day and calcium lockouts (stunted new growth) the next. The solution was consistent monitoring – daily, especially in smaller reservoirs – and using high-quality pH up/down solutions. I quickly learned that cheap pH pens are a false economy; they drift and give inaccurate readings, leading you to chase your tail. Invest in a reputable, calibrated pH meter and calibrate it weekly. Think of pH as the key that unlocks the nutrient cabinet for your plants. Without the right key, the cabinet stays locked, no matter how full it is.
You’re Flying Blind with Nutrient Management (EC/TDS is Your Dashboard)
Many beginners, myself included, treat hydroponic nutrients like fertilizer for a houseplant: "add a capful and hope for the best."This approach is a recipe for disaster. Hydroponics isn’t about guesswork; it’s about precision. Your plants aren’t communicating their hunger or thirst in obvious ways until it’s often too late. This is where an EC/TDS meter becomes your absolute best friend and your system’s indispensable dashboard.
EC (electrical conductivity) or TDS (total dissolved solids) measures the concentration of dissolved salts (your nutrients) in your water. Too low an EC, and your plants are starving; too high, and you’re burning their roots with nutrient toxicity. I used to just refill my reservoir with fresh nutrient solution when the level dropped. This led to massive EC spikes because plants absorb water faster than nutrients, leaving a concentrated solution behind. The result? Burnt root tips and irreversible damage. What actually works is regularly checking the EC. If your EC drops, your plants are hungry. If it rises, they’re drinking more water than nutrients, and you need to top off with plain, pH-adjusted water (or even dilute your solution).
Furthermore, regular reservoir changes are crucial. Even with perfect EC management, nutrients can become unbalanced over time as plants selectively absorb different elements. Beneficial microbes can also build up, along with undesirable algae. I found changing my reservoir completely every 7-10 days, even if it wasn’t empty, dramatically improved plant health and minimized problems. It’s like pressing a reset button, ensuring a fresh, balanced nutrient profile. This isn’t just about feeding your plants; it’s about maintaining a stable, clean environment for their roots. Without understanding and actively managing EC/TDS, you’re driving blind, and your harvest will inevitably suffer.
Your Lighting Might Be Killing Your Plants Slowly (It’s More Than Just ‘Bright’)
When most DIY hydroponic growers think about lighting, they often focus solely on wattage or whether it’s an ‘LED grow light.’ While these are factors, they only tell part of the story. My initial lighting setup was a mishmash of shop lights and a cheap full-spectrum LED, which led to stretchy, pale plants that barely produced. I thought more light was always better. It turns out, it’s about the right light, at the right intensity, for the right duration, and with the right spectrum.
The critical metric often overlooked is Daily Light Integral (DLI). This measures the total amount of photosynthetically active radiation (PAR) that plants receive over a 24-hour period. Different plants have different DLI requirements. Lettuce needs far less than tomatoes. Without understanding DLI, you’re either burning your plants with too much light (leading to nutrient lockout and stress) or starving them with too little (resulting in leggy, unproductive growth). Investing in a PAR meter can be expensive, but there are smartphone apps (like Photone) that, while not perfectly accurate, can give you a much better estimate than just guessing. This helped me adjust my light intensity and duration to match my plants’ actual needs.
Light spectrum is also vital. “Full spectrum” is a broad term. Plants primarily use red and blue light for photosynthesis. Cheap LEDs often have gaps in their spectrum or an excess of green light, which plants largely reflect. A balanced spectrum, often with a slight bias towards blue for vegetative growth and red for flowering/fruiting, makes a huge difference. What really worked for me was using dedicated horticultural LED fixtures from reputable brands, even if it meant a higher upfront cost. They are designed with plant-specific spectrums in mind, delivering more usable light per watt. Don’t underestimate the power of proper lighting; it’s the engine that drives your plants’ growth and productivity.
Root Health and Aeration Are Your System’s Unsung Heroes
When plants are grown in soil, the soil itself provides physical support, stores water and nutrients, and, crucially, allows for gas exchange around the roots. In hydroponics, you’re replacing this complex medium with a simple solution, and often, inert media. This means you must actively manage root health and ensure adequate oxygenation, something often completely overlooked by DIY enthusiasts.
My early failures often involved slimy, brown roots – a classic sign of root rot, typically caused by a lack of dissolved oxygen in the nutrient solution. Plants’ roots need oxygen to respire and absorb nutrients. Without it, they suffocate and die, becoming prime targets for anaerobic bacteria and fungal pathogens. Just having a pump circulating water isn’t enough; the water itself needs to be consistently oxygenated. Investing in a good air pump and air stone for your reservoir is non-negotiable. This creates bubbles that agitate the water surface and dissolve oxygen into the solution. I learned that even a powerful air pump isn’t effective if the air stone is clogged or too small for the reservoir volume. Regularly cleaning or replacing air stones ensures maximum efficiency.
Beyond dissolved oxygen, ambient air circulation around the foliage and plant canopy is also critical. Stagnant, humid air creates a breeding ground for fungal diseases like powdery mildew, especially in confined indoor setups. A small oscillating fan directed at the canopy (not directly at the roots, which can cause them to dry out) will improve transpiration, strengthen plant stems, and reduce humidity pockets. This simple addition transformed my plants from weak, disease-prone specimens to robust, healthy producers. Never underestimate the power of fresh, circulating air for both your roots and your leaves; it’s an invisible shield against many common hydroponic ailments.
Ignoring Temperature Control is a Silent System Killer
Just as humans need a comfortable temperature range to thrive, so do plants, especially their roots in a hydroponic system. Many DIY setups overlook the critical importance of maintaining stable water and ambient air temperatures. My early systems were placed in a garage that got hot in summer and cold in winter, leading to erratic growth and constant problems. I learned the hard way that temperature extremes are silent system killers.
Water temperature is paramount. The ideal range for most hydroponic crops is between 65-72°F (18-22°C). If your water gets too warm (above 75°F/24°C), dissolved oxygen levels plummet, creating an anaerobic environment ripe for root rot and pathogen proliferation. Your roots literally can’t breathe. Conversely, if the water gets too cold (below 60°F/15°C), nutrient uptake slows dramatically, stunting growth and increasing susceptibility to disease. My plants in the hot garage suffered from a constantly struggling root system, leading to overall plant failure despite what seemed like adequate nutrients. A simple submersible water chiller or even frozen water bottles (for smaller systems) can regulate high temperatures, while a small submersible aquarium heater can combat cold. Monitoring water temperature daily with a reliable thermometer is essential.
Ambient air temperature also plays a significant role. Extreme air temperatures stress plants, reducing their ability to photosynthesize efficiently and transpire properly. Too hot, and they can wilt, get sunburned, or struggle with nutrient uptake. Too cold, and growth slows to a crawl. I learned to use inexpensive digital thermometers/hygrometers to monitor my grow area and, if necessary, employ small fans for cooling or a small space heater for warmth to maintain a consistent range (typically 70-78°F/21-26°C during the day). Without stable temperatures, your plants are constantly fighting an uphill battle against their environment, draining energy that should be going into growth and yield. This often-ignored factor is a major differentiator between struggling systems and successful, abundant harvests.
Frequently Asked Questions
Q: My plant leaves are yellowing, but my EC/TDS is good. What’s wrong?
A: Yellowing leaves, especially older ones, often indicate a nitrogen deficiency. However, if your EC/TDS is within the recommended range, the issue might be pH. If the pH is too high or too low, even if nitrogen is present, the plant cannot absorb it (nutrient lockout). Check and adjust your pH to the ideal range (5.5-6.5). Other possibilities include insufficient light (low DLI), or root problems preventing uptake (check roots for sliminess or browning, indicating root rot).
Q: How often should I change my hydroponic nutrient reservoir?
A: For most home DIY systems, a full reservoir change every 7-10 days is ideal. Even if your EC/TDS is stable, plants selectively absorb nutrients, leading to an imbalance over time. A fresh batch of solution ensures optimal nutrient ratios and helps prevent pathogen buildup. Topping off with plain, pH-adjusted water between changes is common, especially if your EC is rising due to plants drinking more water than nutrients.
Q: Do I really need an air pump and air stone for my reservoir?
A: Yes, absolutely. Plant roots require dissolved oxygen for respiration and nutrient uptake. Without adequate oxygen, they suffocate, leading to root rot, nutrient lockout, and overall plant death. A good air pump and air stone create bubbles that increase the dissolved oxygen in your nutrient solution, which is critical for healthy root development and a thriving system, especially in deep water culture (DWC) or recirculating systems.
Q: What’s the best light for a small DIY hydroponic setup?
A: The “best” light depends on your plants and budget. For leafy greens and herbs, a high-quality, full-spectrum LED fixture designed for horticulture is generally best. Look for lights that provide sufficient DLI (Daily Light Integral) for your specific crop. While compact fluorescent (CFL) or T5 fluorescent lights can work for seedlings and very low-light plants, LEDs offer better efficiency, spectrum control, and longer lifespan for most productive hydroponic gardens. Prioritize even light distribution and adjustable intensity.
Q: My water temperature keeps getting too high. How can I fix this?
A: High water temperature (above 75°F/24°C) is detrimental to root health and encourages root rot. For small systems, frozen water bottles can offer temporary relief, but a more consistent solution is a submersible water chiller designed for aquariums or hydroponics. Ensuring good air circulation around your reservoir and keeping the grow area cool will also help. Insulating your reservoir can also provide some temperature stability.
Conclusion
Successfully growing with DIY hydroponics isn’t about magical green thumbs or expensive, high-tech equipment. It’s about understanding the fundamental needs of your plants and the delicate balance required in a soilless environment. The struggles you’ve faced – the yellowing leaves, the stunted growth, the general sense of ‘why isn’t this working?’ – are almost certainly tied to one of the core principles we’ve discussed: water quality and pH, nutrient management via EC/TDS, appropriate lighting, root oxygenation, or temperature control.
My journey from a plant graveyard to a consistently productive hydroponic garden began when I stopped guessing and started measuring. It’s an iterative process of learning and adjusting. Don’t be discouraged by past failures; view them as invaluable lessons. Start by perfecting your water quality, consistently monitoring pH and EC, ensuring ample root aeration, and dialing in your lighting and temperatures. These aren’t just tips; they are the non-negotiable pillars of hydroponic success.
Your next step? Pick one of these areas you’ve been neglecting and make a tangible improvement this week. Get that pH pen, buy an air pump, or research the DLI for your specific crops. Small, intentional changes based on understanding the why behind the problems will compound into truly bountiful harvests. Happy growing!
Written by Sarah Jenkins
Saving & Financial Planning
Sarah leveraged her freelance writing income to eliminate significant debt and now shares her strategies.
You Might Also Like

Why Most People Fail at Mastering Their New Air Conditioner (And The Strategic Approach That Actually Works for Real Comfort and Savings)
Struggling with your new AC? Discover why basic settings fall short and the strategic approach to achieve real comfort and energy savings.
Why Your Car Stereo Has No Bass (And What Actually Works for Deep, Punchy Sound)
Struggling with weak car bass? Discover why most setups fail and learn the pro strategies for deep, punchy sound that transforms your driving experience.

Why Your Home Still Feels Stale (Even After Cleaning) — And The Hidden Culprits Nobody Talks About
Discover why your home still feels stale after cleaning, and uncover the hidden culprits and lasting solutions nobody talks about.