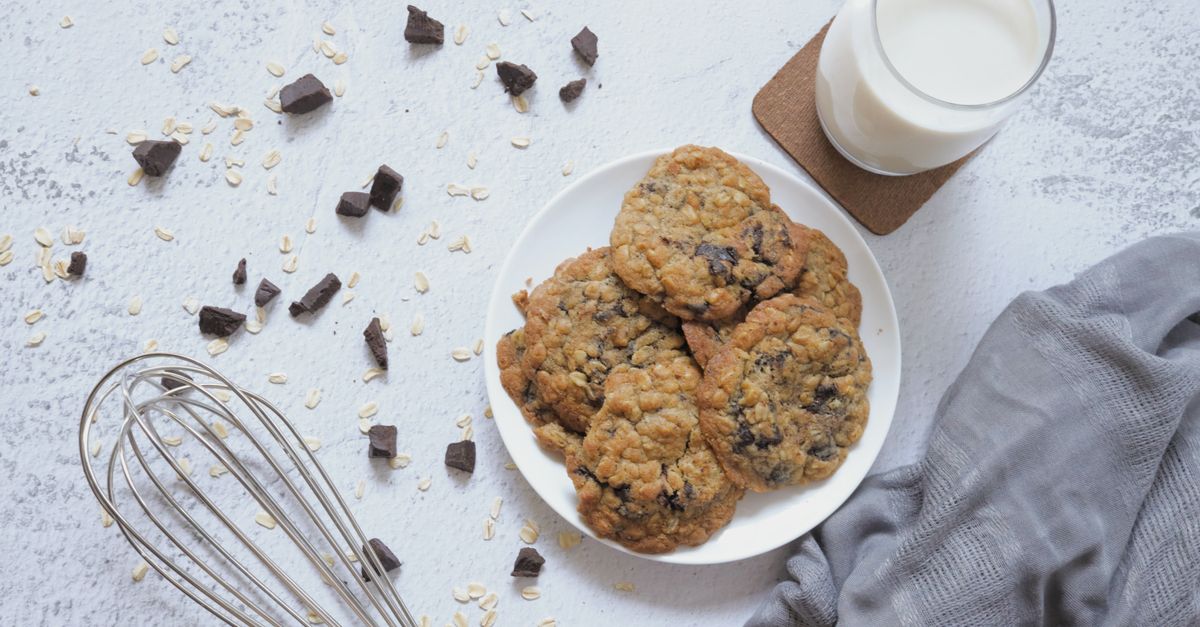
Why Your Homemade Cookies Are Flat (And The Simple Fixes That Guarantee Perfect, Puffy Results Every Time)
You’ve spent the afternoon carefully mixing, scooping, and baking, anticipating that perfect moment when a batch of golden, puffy, chewy cookies emerges from the oven. Instead, you’re greeted with a tray of sad, thin, uniformly flat discs. It’s a common culinary heartbreak, one I’ve experienced more times than I care to admit. For years, my cookies were consistently flat, spreading into a single, amorphous blob, tasting fine but utterly lacking that satisfying thickness and chew. I blamed my oven, my recipe, even the phase of the moon. But through endless experimentation (and a lot of edible mistakes), I discovered that the culprits were almost always simple, overlooked details in the baking process.
Most people assume a flat cookie is a recipe flaw, but more often, it’s a technique problem. It’s not about finding a new recipe; it’s about mastering the subtle science behind the one you already love. What changed everything for me was understanding how each ingredient and step contributes to the cookie’s final structure. This isn’t about being a baking pro; it’s about being a mindful baker, paying attention to the nuances that transform a flat disappointment into a perfectly puffy triumph.
Key Takeaways
- Ensure your butter is softened, not melted, and cream it thoroughly with sugar to create essential air pockets.
- Chill your cookie dough for at least 30 minutes to firm up fats, preventing excessive spread in the oven.
- Measure your flour accurately using a kitchen scale or the ‘spoon and level’ method to avoid too little structure.
- Use fresh, active leavening agents like baking soda and baking powder to ensure proper lift and texture.
The Butter Paradox: Softened, Not Melted, is Key
The most common mistake I see, and one I made religiously for years, involves butter temperature. Many recipes call for “softened butter,” which people often interpret as “slightly melty butter” or, in a rush, they microwave it to oblivion. This is a crucial error. Butter that’s too warm or partially melted loses its ability to hold air when creamed with sugar. That creaming process is essential; it incorporates tiny air bubbles into the fat, which then expand in the oven, giving your cookies their lift and tenderness.
Think of it this way: cold, hard butter won’t cream properly, leading to a dense cookie. But truly melted butter behaves like a liquid, not a solid, and those essential air pockets can’t form. The sweet spot is butter that’s soft enough to leave an indentation when gently pressed, but still cool to the touch and holding its shape. This usually means leaving it out on the counter for 30-60 minutes, not nuking it. In my experience, if your butter looks at all greasy or shiny, it’s too warm. If you’re short on time, cut cold butter into small cubes and let it sit for 10-15 minutes, or gently pound it with a rolling pin to soften without melting. This single adjustment drastically improved the texture of my cookies, giving them a much-needed internal structure and preventing that dreaded flat spread.
The Chill Factor: A Mandatory Dough Spa Day
I used to be so impatient. Dough mixed, oven preheated, straight to the baking sheet. Big mistake. Chilling your cookie dough is not an optional suggestion; it’s a non-negotiable step for perfectly puffy cookies. Here’s why:
- Firms the Fats: Butter and other fats in the dough solidify when chilled. When these firm fats hit the hot oven, they take longer to melt and spread. This extended melting time allows the cookie’s structure (from flour and leavening agents) to set before the fat completely melts, trapping those air bubbles and creating height.
- Hydrates Flour: Resting the dough allows the flour to fully absorb the liquids. This hydration strengthens the gluten structure, making the dough less prone to spreading. It’s like letting pasta dough rest – it becomes more pliable and holds its shape better.
- Concentrates Flavor: As a bonus, chilling also gives the flavors time to meld and intensify, leading to a richer, more complex cookie.
In my kitchen, 30 minutes in the fridge is the absolute minimum, but an hour is better, and even overnight can work wonders. If your dough is particularly sticky or warm from mixing, a longer chill is definitely warranted. Scoop your dough before chilling if you want perfectly uniform shapes, or chill the whole bowl and scoop later for a more rustic look. This step might test your patience, but the difference in puffiness and chewiness is profound.
The Flour Fiasco: Precision Over Guesswork
Baking is a science, and measuring ingredients accurately is paramount. When it comes to flour, “scoop and dump” is the enemy of the puffy cookie. Flour is easily compacted, meaning if you scoop it directly out of the bag with your measuring cup, you could be adding up to 25% more flour than the recipe intends. Conversely, too little flour will lead to a very weak structure that can’t hold its shape against the melting butter, resulting in a flat cookie.
The Solution: Invest in a kitchen scale for precise measurements (most accurate) or, if using measuring cups, employ the “spoon and level” method. To do this, use a spoon to lightly fluff the flour in its container, then spoon it into your dry measuring cup until it overflows. Finally, use a straight edge (like the back of a knife or a ruler) to level off the excess flour. This ensures you’re getting a consistent amount every time. I was astounded by how much a simple flour measuring technique changed my cookie game. It’s the unsung hero of structural integrity.
Leavening Agents: Are They Still Kicking?
Baking soda and baking powder are the unsung heroes of cookie puffiness. They’re responsible for creating those airy pockets that give cookies their rise. However, they don’t last forever, and using old, inactive leavening agents is a sure-fire way to end up with flat cookies.
- Baking Soda: Reacts with acidic ingredients (like brown sugar, buttermilk, or lemon juice) to produce carbon dioxide gas. Test its freshness by mixing a teaspoon with a tablespoon of vinegar or lemon juice. If it bubbles vigorously, it’s good.
- Baking Powder: Contains both an acid and a base, reacting when wet and again when heated in the oven. Test its freshness by mixing a teaspoon with a tablespoon of hot water. If it fizzes, it’s still active.
Both typically last about 6-12 months once opened. I make it a habit to label my containers with the date I opened them and replace them annually, even if they’re not empty. This small preventative measure ensures my cookies get the lift they deserve. Don’t underestimate the power of fresh leavening agents; they’re literally the air beneath your cookies’ wings.
Oven Temperature & Baking Sheets: The Heat is On
An inaccurate oven temperature is a stealthy culprit for flat cookies. If your oven runs too cool, the butter in your dough will melt and spread excessively before the cookie has a chance to set its structure. If it’s too hot, the outside might crisp too quickly, preventing proper rise and potentially burning.
My Recommendation: Use an oven thermometer. Most built-in oven thermostats are notoriously inaccurate, sometimes off by 25-50 degrees Fahrenheit. An external thermometer gives you the real-time temperature, allowing you to adjust accordingly. I found my oven was consistently running about 20 degrees cooler than it indicated, which explained many of my early baking woes.
Furthermore, the type of baking sheet matters. Darker sheets absorb more heat, leading to faster browning and potentially more spread before setting. Lighter-colored, heavy-gauge aluminum baking sheets promote more even baking and reduce excessive browning on the bottom. Always use parchment paper or silicone baking mats to prevent sticking and ensure even heat distribution. A slightly hotter oven (e.g., 375°F instead of 350°F) for some cookies can also help them set faster before spreading too much, but this depends heavily on your specific recipe and oven calibration.
The Sugar Ratio: A Delicate Balance
The ratio and type of sugar in your cookie recipe play a significant role in spread and chewiness. Granulated sugar tends to promote more spread and crispiness, as its crystals melt quickly and thin the dough. Brown sugar, on the other hand, contains molasses, which adds moisture and acidity, resulting in a softer, chewier, and often thicker cookie.
If your cookies are consistently flat, and you suspect the sugar ratio, consider a few things:
- Too much granulated sugar: This can lead to excessive spread. While I don’t recommend altering a recipe blindly, if you’re adapting or creating your own, be mindful of this balance.
- Too little flour relative to sugar: This goes back to structural integrity. If there’s not enough flour to support the sugar as it melts, the cookie will collapse.
I once tried to reduce the sugar in a recipe significantly, hoping for a ‘healthier’ cookie. The result was a pale, dense, and utterly flat disappointment. The sugars contribute not just sweetness, but also to the cookie’s structure, moisture retention, and browning. For puffier cookies, a good balance often leans slightly more towards brown sugar or ensures that the granulated sugar isn’t overwhelming the flour structure. This is often where a solid, well-tested recipe is your best friend, as these ratios are carefully calibrated.
Frequently Asked Questions
Can too much butter make cookies flat?
Yes, absolutely. While butter is essential for flavor and texture, too much butter, or butter that is too warm/melted, will cause cookies to spread excessively in the oven, leading to a flat result. The fat melts too quickly before the structure can set.
Does adding an extra egg make cookies puffier?
Adding an extra egg, particularly an extra egg yolk, can sometimes make cookies chewier and slightly thicker due to the added fat and emulsifiers. However, a whole extra egg (adding more liquid) might lead to more spread if the rest of the ingredients aren’t balanced. Focus on proper butter temperature, chilling, and flour measurement first.
Why do my cookies still spread even after chilling the dough?
If your cookies still spread after chilling, double-check your butter temperature (ensure it’s softened, not melted), flour measurement (too little flour means less structure), and oven temperature (an oven that runs too cool will still cause spreading). Also, ensure your baking sheets aren’t too hot from a previous batch; let them cool completely.
What kind of baking sheet is best for puffy cookies?
Lighter-colored, heavy-gauge aluminum baking sheets are generally best. They distribute heat evenly, preventing excessive browning and allowing the cookies to set their structure before spreading too much. Avoid dark-colored sheets or thin, flimsy ones.
How long should I chill cookie dough for best results?
At least 30 minutes in the refrigerator is a good starting point. For even better results, chill for 1-2 hours. Many bakers find that chilling overnight (8-12 hours) yields the best texture and flavor development, leading to significantly thicker, chewier cookies.
Conclusion
Achieving that perfectly puffy cookie isn’t a dark art; it’s a series of small, intentional adjustments. My journey from flat, sad cookies to consistently delightful, thick, and chewy treats was paved with understanding these often-overlooked details. It wasn’t about finding a magic recipe, but about respecting the science of baking. By paying attention to your butter’s temperature, giving your dough a proper chill, measuring your flour with precision, ensuring your leavening agents are active, and understanding your oven, you’ll transform your baking. Embrace the process, be mindful of each step, and you’ll soon be enjoying those bakery-worthy, perfectly puffed cookies you’ve always dreamed of. Now, go forth and bake with confidence – your perfectly puffy cookies await!
Written by Sarah Jenkins
Saving & Financial Planning
Sarah leveraged her freelance writing income to eliminate significant debt and now shares her strategies.
You Might Also Like

Why Most People Fail at Mastering Their New Air Conditioner (And The Strategic Approach That Actually Works for Real Comfort and Savings)
Struggling with your new AC? Discover why basic settings fall short and the strategic approach to achieve real comfort and energy savings.
Why Your Car Stereo Has No Bass (And What Actually Works for Deep, Punchy Sound)
Struggling with weak car bass? Discover why most setups fail and learn the pro strategies for deep, punchy sound that transforms your driving experience.

Why Your DIY Hydroponics Fails Most People (And What Actually Works for Bountiful Harvests)
Struggling with DIY hydroponics? Discover the hidden mistakes ruining your yields and the actionable strategies that lead to thriving, abundant harvests.